To better prepare myself for the actual photo shoot and editing session afterwards, I will conduct a series of experiments beforehand.
I will experiment taking photos in low and high key light to see which mode would suit my photo series better.
I’ll also experiment with various depths of field and exposure settings.
I’ll also try out different ways to use layer masks in Photoshop so that I know exactly what to do when I begin to edit my photos.
I went into the forest to experiment with different photography styles on various objects.
I took some photos of the things I saw and the landscapes to get a better feel for the locations, as ell as helping me decide what backgrounds to use for my final photos.
I was mostly experimenting with different depths of field because that was what concerned me the most in terms of the photo session for this project. I found it more fascinating to use spiders and their webs as the objects of interest because a spiderweb is difficult to focus on, and the spider on it is the most visible thing on it. When focusing on the spiders didn’t work, I just moved my hand right in front of the web and focused on that, and then refocused again so that it understands the area I was trying to capture.
I tried out some low and high key photos, and, unsurprisingly, found out that I prefer photos in low key.
I also found a torn stuffed toy just hanging on the branches, which was an interesting thing to witness, so I used that landscape as a way to test out different angles of shots. I think the first picture doesn’t really capture the toy as the main object of interest, and the second photo does a better job, but it isn’t artistic enough – it just looks plain. I think the last picture is the best because while I focused on the plant in front of it, the toy has that white glow from the natural light, and it still stands out from the photo because of the contrasting colours – it looks better composed than the previous ones.


I also experimented with different depths of field when I saw a beautiful sunset behind the window with the water droplets shining in the sun. I really liked the colours of the sky and the composition of the dark trees and houses and contrasting light cloudscape.
As I needed a mushroom for one of my photos, I started looking for them in the forest. This is the only one I found on my way, but I wasn’t that fond of the lighting, and different attempts at colour-grading the photo later didn’t help..
So I dug up a photo I took last year when my dad and I went to the World Rally Championship in Wales. I remembered about the interesting lighting this photo had, and this was my best chance to use it.
I tried out using the fish-eye lens on the rabbit photo, and then I tried without it. To be honest, I didn’t mind any way – I just needed the rabbit to be highlighted from the back, because that’s where my sister would be sitting when I edit. I waited until it was midday so that the light wouldn’t be too bright, but it would be enough to illuminate the back, and that’s why I opened the window – to push the back of the plush out and let the lighting cover a bigger area.
In this video I show some of the props which I will be using.
These are the scissors I ended up using because of the peculiar shape. I needed neutral, a bit dark lighting to evenly cover it because it would be in the darkness when I edit.
I performed the photoshoot when my sister had come over during the holidays as planned, mostly using three table lights for minimal illumination because I wanted all the photos to have that dreamlike dark background effect, where the focus is on the subject – my sibling – and the objects she’s interacting with. It also conveys the fact that memories are a blur, that’s why I found the mysterious dark setting fitting to the scenes. For certain photos, I turned on the ceiling lights in the room so that she would be illuminated for evenly according to the situation in some pictures.
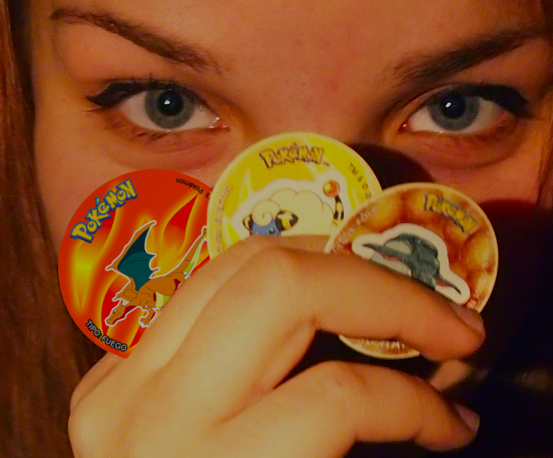
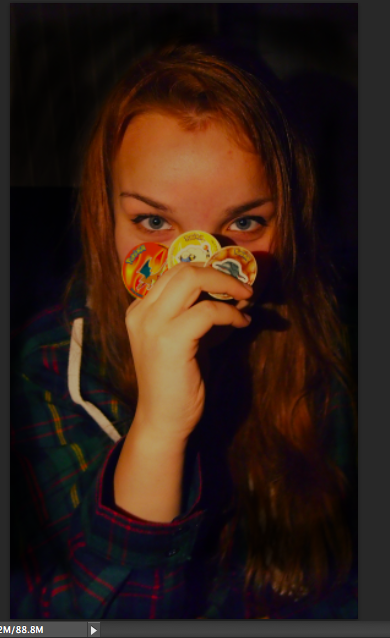
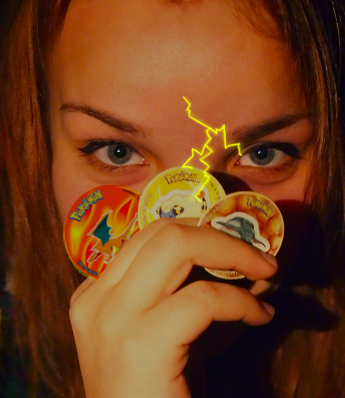
One of my ideas was conveying the expression of determination and empowerment when playing with tazos. (More information about all of the objects on my Research page, information about the ideas – on the Ideas page.) I took the photo on the left with focus on the hand holding the tazos in case I couldn’t properly focus the camera on the hand and my sibling at the same time – in that case I thought I could just edit it on later in Photoshop. I managed to focus on the full scene well enough though, so that wasn’t needed. I really like how the photo on the right turned out; it perfectly demonstrates the expression I wanted to achieve and the feelings I felt when I played with the tazos myself. I especially like how she turned one of her eyebrows higher up – it adds a sense of superiority to the expression.
In terms of the colours and the background, I could color-grade the photo as I want afterwards, so I mostly focused on getting the lighting I was looking for, and I didn’t need any specific environments because, as I mentioned, I’d shade most of them black.
In this photo, she is sketching something that will come off the paper and be ‘brought to life’; I experimented, asking her to show different emotions ranging from determination and shock to contempt and happiness, but I think this photo is one of the best suited ones because she doesn’t seem surprised, so she seems as if she’s enjoying herself and there’s nothing superficial about the situation. That is exactly how I felt when ‘giving life’ to anything I drew, so I’m sure I’ll use a photo like this for my final piece.
This photo is to represent the feelings of annoyance and disgust when having ‘zelyonka’ applied onto rashes from chickenpox, which, I think, my sister expresses very well in the photo. Her position of sitting crouched over in a foetal position was because I wanted to show that you can’t really do anything other than sitting around in the house when you’re sick.
I put up a bottle of hand sanitizer in the picture as a prop because I wanted to see if it suits the overall picture to have a bottle of the solution on a small cabinet behind her, but decided it would look better with the focus fully onto the subject and the background remaining in darkness. I asked her to change her clothes for each photo in which her clothes would be visible, and I chose a red shirt for this photo to accentuate the green zelyonka on her skin (edited in post production) and make the splotches stand out.
I also wanted her to roll up the shirt a little to expose a part of her back not only to show more skin for the zelyonka to be applied on, but also to show the messiness and how little you care about appearance when you’re sick and your skin is itchy.
In these photos I was trying to get her to look as if she is sitting on something – a huge rabbit plush toy. My idea was that she would be holding onto an ear and having one leg over one side of the rabbit. In the photo on the left, I was initially trying to get her to just stand like that because I thought it would look better when I edit it afterwards, but she complained about her legs hurting after standing in that position for a while, so as the photo on the right displays – the most convenient and effective solution we found was a cardboard box to sit on. I’m not yet sure which position looks better; I’ll check when I start editing to have a better idea of the whole composition. I turned on the ceiling lights to evenly illuminate her because I needed to back up with the camera in order to fit her entire body into shot.
In this photo, I was trying to get my sister to look like she’s swinging an axe. As I didn’t trust her near me with an actual axe due to a safety hazard, I got her to hold a cardboard ‘sword’ wrapped with foil instead, as seen in the photo on the left. I told her to hold it upside down so that it resembles a hatchet more – it would make it easier for me to edit it afterwards when I can see the direction in which the axe would be facing.
It took a little while to direct her to stand in the position I wanted until I finally got her to look as if the ‘axe’ in the photo is heavy; I can imagine how it could be difficult to seem like you’re holding a heavy object when in reality you’re holding a cardboard prop.
I asked her to wear a red plaid shirt to subconsciously remind you of a stereotypical lumberjack. In the end, I’m happy with the results because some of the photos looked very convincing.
In this photo, I wanted her to look like she’s manipulating the terrain and having full control of it, to reminisce about the game Zoo Tycoon. She needed to look very focused and fixed on what’s in front of her, which, unsurprisingly, she conveyed very well. I wanted her to wear a multicolored shirt because when I edit it later, I had the idea to make her look like a glitch inside the screen, rather than blending in with the other people.
The final photo is of her being scared of hairdressing. Yet again, the way she expressed childish fear was very suitable, and this is definitely the photo I will use when I edit. 
Instead of a normal chair, I decided to use a foldout chair we have because it reminded me of a terrifying dentist’s chair with protruding metal parts, and I thought it would add to the atmosphere.
For easier editing afterwards, I spontaneously grabbed something with the same width as the scissors would be – which was a large kitchen spoon – and told my sister to hold it in that way so that I see how the hair strand falls down, as if it were between the blades of scissors. I just wanted to see how the hair folds over the blade to add some realism to the scene.
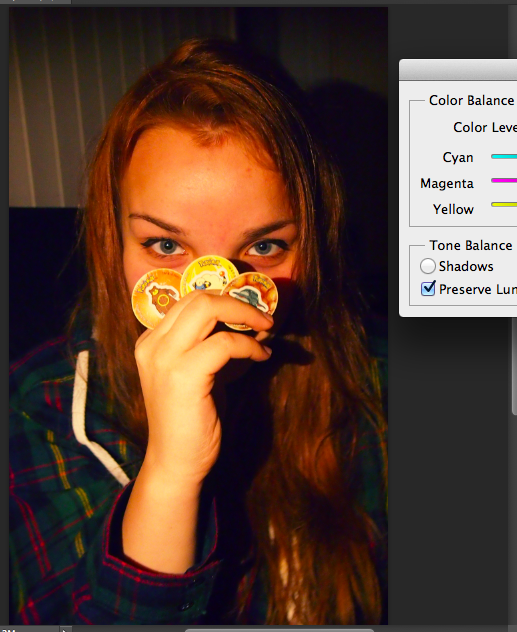
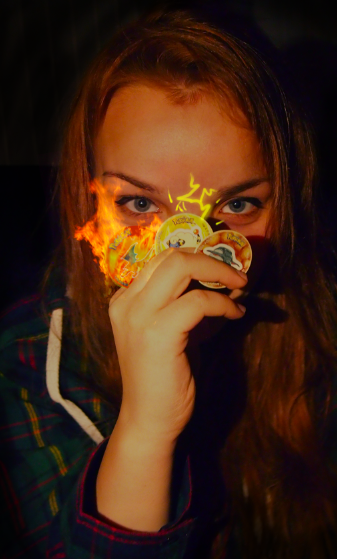
The first photo I started working with was with my sister holding the Pokemon tazos. The first thing I did was correct the colours slightly, but I still needed that orange-yellow lighting to be apparent.
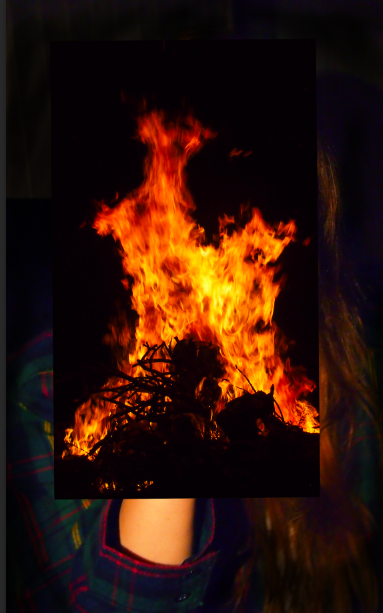
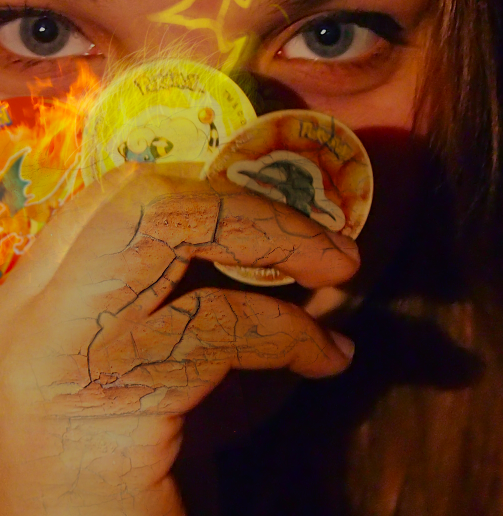
I wanted to create the effects according to each Pokemon type – Fire, Electric and Rock, – and for the fire effect I chose a photo I had taken last year during a visit to Latvia, a huge fireplace. I used that photo because the background was pitch black, so it would be easy for me to extract the fire.
In terms of the background, I simply created a new layer just to use a soft brush with black on 30% opacity, and I just painted the background away softly to blend in with my sister. I needed the focus to be on just the light in front of her face, and I didn’t need any background components.
All I did was just change the layer style to Screen, and it removed all the dark parts and only showed a nice, see-through fireplace.
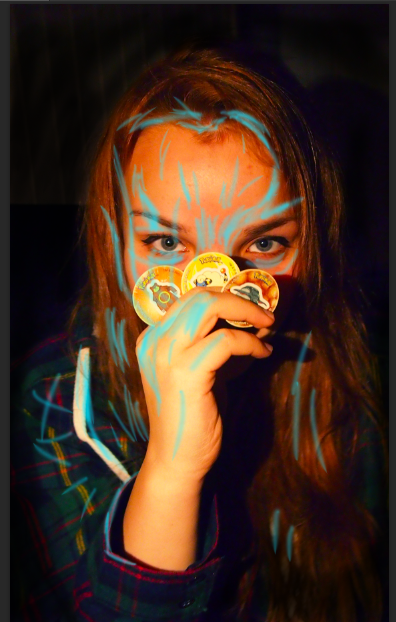
I made a mock layer just to draw some basic lines to have a clear idea of where the light would be shining and where the shadows would be.
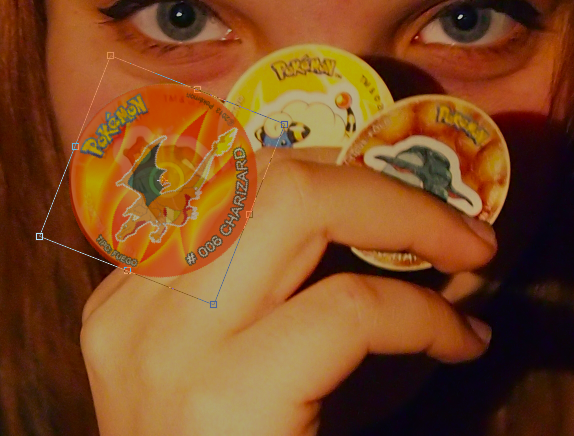
I had the idea of having a Fire type tazo instead of Ground, just because it would be easier to execute than imagining an element for Ground. I didn’t have the Fire type tazo at hand when we had the photo session, so I just took a photo afterwards and extracted the tazo itself from it, placing it over the Ground type tazo. I lowered the opacity of the layer to make it easier for me to see how big it should be.
I then erased the excess bits that went over her hand and blurred it to fit in with the rest of the tazos.
I thought it looked pretty feasible so far.
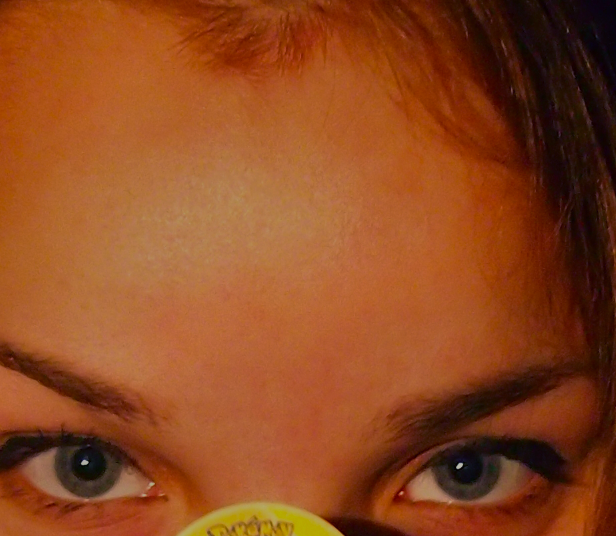
Then I just used the Spot Healing tool to remove some blemishes from her forehead because I remember her feeling a bit self-conscious about that. Didn’t make that much difference, but I respected her willingness to perform the shoot, so I felt obliged to fix the spots she was worried about.
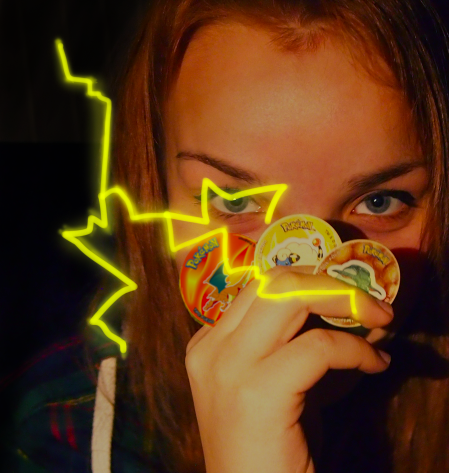
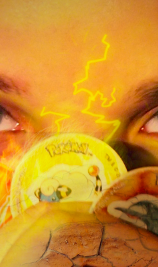
After I had finished the fire, I needed to draw some representation of lightning because just electric sparks wouldn’t have that much impact. I drew the lines with a hard brush first, and then followed up with a soft brush for a slight illumination effect.
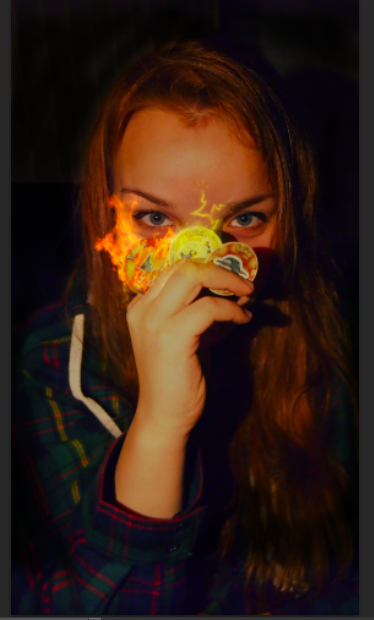 I tried different variations of some sparks flying off to see what works, but I couldn’t find a golden midway, so I just focused on the Rock type for the time being.
For the Rock type, I used a photo of a crackled wall texture I’d taken before. I lowered the opacity of it to blend in and corrected the colours to match her skintone.
After that, I redrew the lightning and was happy with the result. It was more subtle and I thought it had better composition than the previous draft.
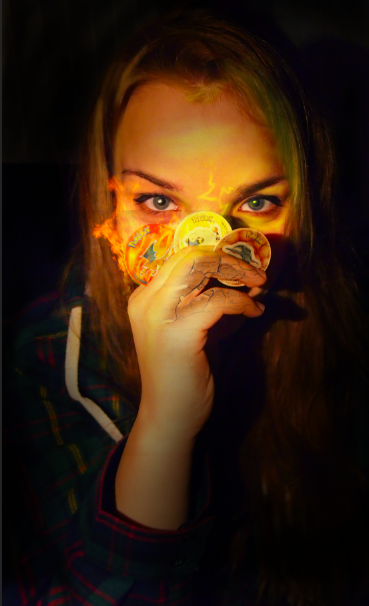
Finally, I was just refining the light shining from the lightning and fire – I only used soft brushes in orange and yellow and followed along the lines I had drawn on the mock layer before.
This is the final photo.
The process for editing the rest of my photos was always pretty similar, so I thought I would create screen recordings of myself talking about how I edited them and what went through my mind.
Chicken Pox image:
Process:
Drawing finished image:
Hairdressing image:
Process:
Mushroom image:
Process:
Rabbit image:
Process:
Zoo Tycoon image:
Process:


